

Got my first legit commission order, just last week. The model was put in my hands Wednesday and have gotten to work on it right away.
Lets get right into this commission piece, an Imperial Bunker.
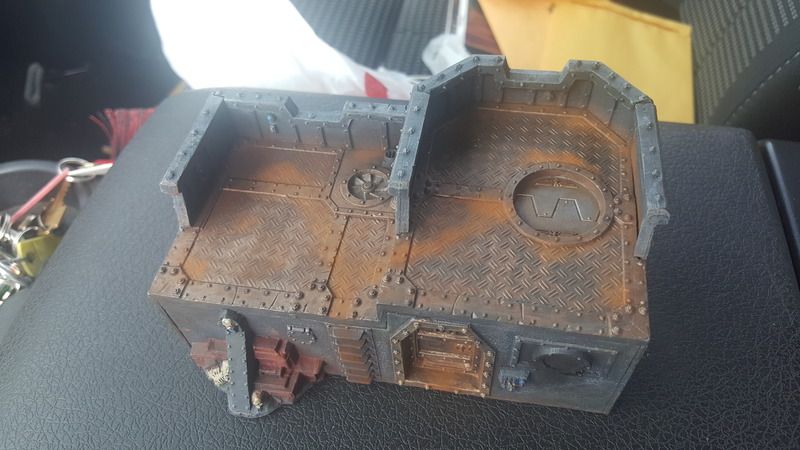
The finished product, alot more on this project in the read more section.
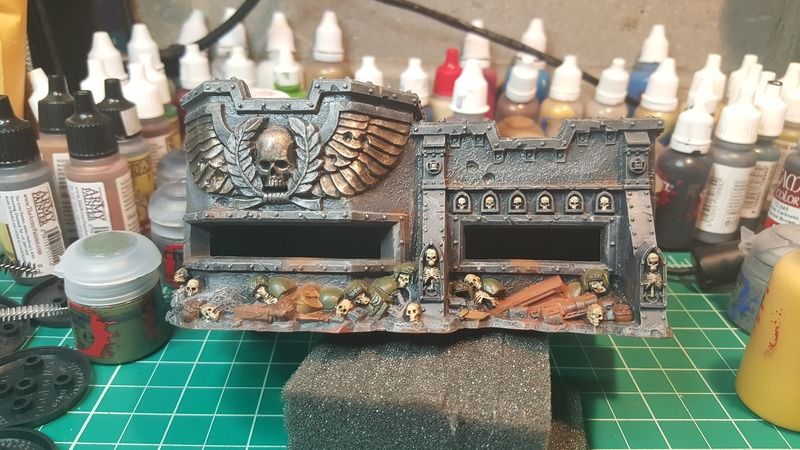

The Imperial Bunker, this was a piece that brought alot of excitement. I had never previously seen one on the game board up to this point in my gaming. That added to the challenge abit since I wasn't 100% sure about its usage in the field.
Turns out its exactly as you would expect, a cheap fortification that 5 troops can shoot out of giving them a armor 13 protective shell. Lots of possibilities for something with a price tag of 50pts. A few lascannons put in side can really create some trouble, with a 48in threat range.
Just like all projects I researched the model and look at alot of pictures to get a idea of how it should look vs how it should never look. The internet has a wide range of players and all have there own idea of how something should be painted. Once I find 10 to 20 examples of the model I then review, them before undertaking the project.
I was pretty sure on my scheme before I started this process, and this step only strengthened my confidants in the scheme.
First make sure to use a sharp hobby knife, don't use a dulled out blade. I also used some sandpaper sticks and removed the mold lines.
There is not alot of mold lines on the model, but there are mold lines on it. The most prominent lines are on the top ramparts between each bolt. I saw several online and most had those mold lines still on the finished model. They really stand out, so always remove your mold lines before painting.
This is very important for this scheme cause your drybrushing, washes and powders will catch those mold line and make them stick out even more then normal.

I started the project, by airbrushing black primer over the model. After the primer dried I airbrushed Eshin grey over the bunker, Runebrass was used as a base for the roof and three doors.
I then highlighted the Eshin grey with a light blend mix with cold grey.
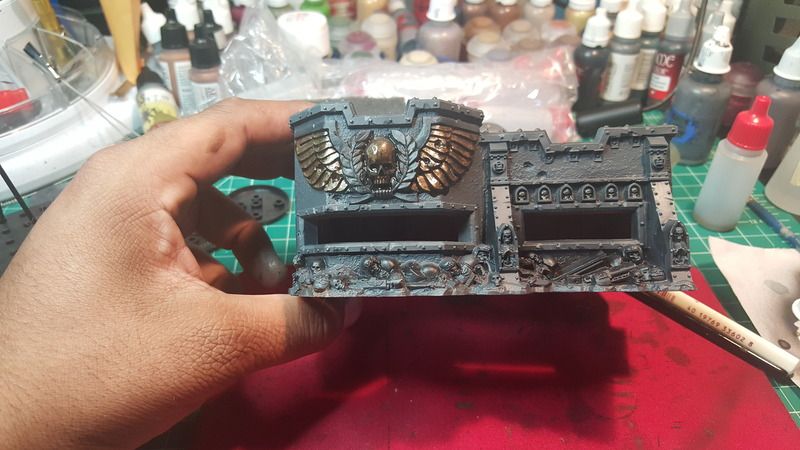
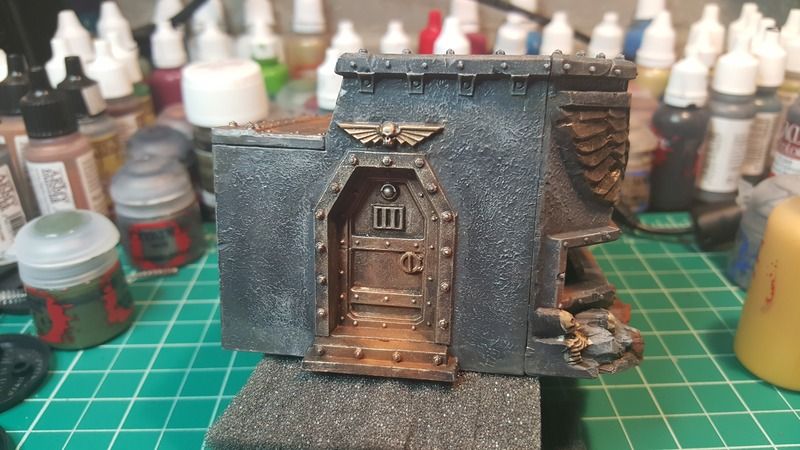
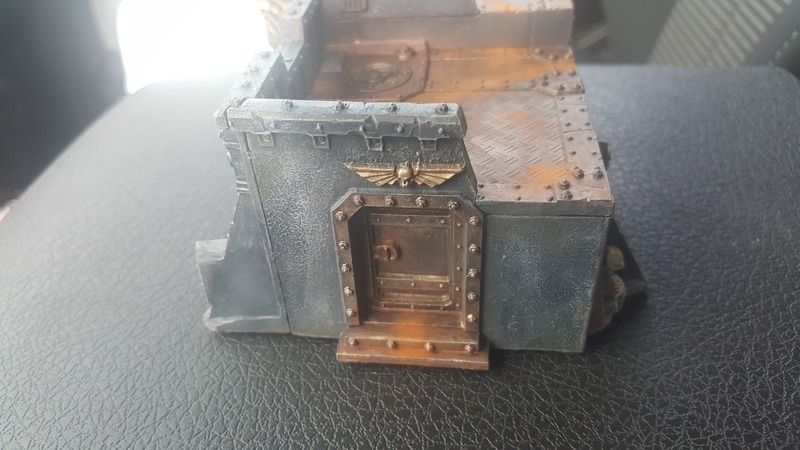
Using liquid gold from vallejo I painted the Imperium seals on the bunker, is one large, 2 medium and 2 small ones on the building. I also lightly put some liquid gold into the cracks of the doors as a highlight. I feel this gave the door some more contrast and added to the worn look of the door.

I also used some thinned down Leadberchel on the hatches, vents and on some small parts on the doors.

I then started to dry brush the building, using dawnstone as first layer and then administrim grey as a highlight focusing on the sharp edges. You don't want to put the 2nd dry brush all over cause it will, make the first drybrush unnoticeable.

I also did the rocks along the bottom of the bunker at this time. There are rocks on the front and the back of the model.

I then used a precision sized brush and started basing the skeletons/other gear in front of the bunker. I also lightly highlighted the eagles with gold griffon.
Be neat! Don't over brush on to your rocks and walls!

I had ordered some weathering powders, and a few special washes for my hobby table. This lovely piece was the first model to enjoy my new tools.

I used a greenish wash. " concrete " wash from secret weapons to add further weathering and contrast to the walls.
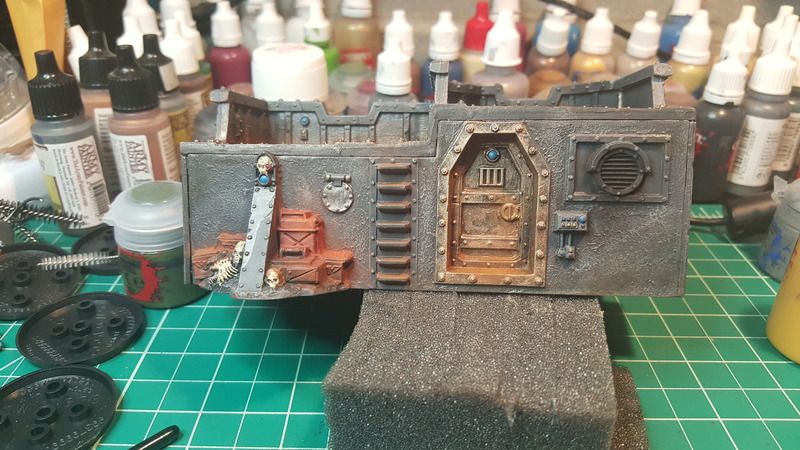
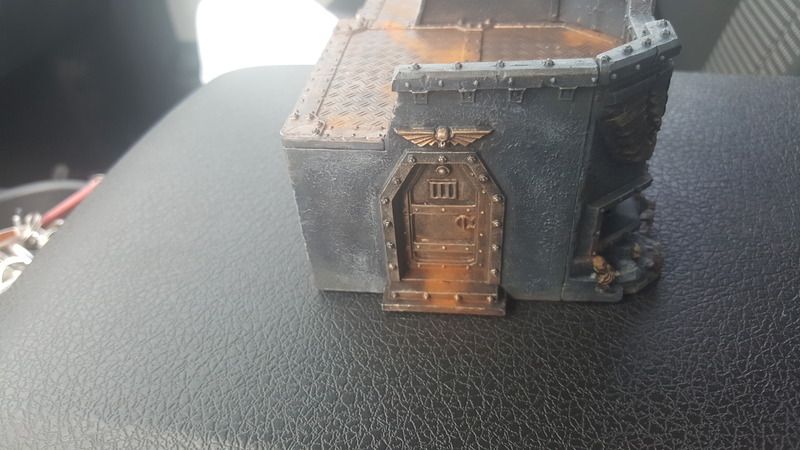
I then started adding weathering powders, using black exhaust on the vent, then used 3 tones of Earth powders on the roof and footsteps of the doors. Also put some on the front openings, to give an affect of boxes, or troops crawling in and out.
Then used rust tone weathers on some of the gear along the edge.
I then finished with final detail, with buttons, lights, wires and other small parts. I did do some weathering and dry brushing on those parts so the blended properly.
Once finished I used vallejo satin varnish to seal the model, my air brush is a Evolution Silver-line series 2 in 1 package. It has gauges for paint control and air pressure control. I turned the the air down to a low setting before spraying the model. If you spray to close with a high pressured air you can remove the weathering powders.
I suggest doing 2 layers of varnish one before you start weathering and a light one after.

After the varnished dried, I touched up the weathering powders, abit more to bring some of the color back out on the model. Sometimes the varnish can dull the blend on weathering powders. Applying a few light strokes of powders only took 2 mins tops.
I then did a small black oil paint affect with a brush, and spirits under the rear exhaust vent. Once dry I applied two strokes of black exhaust weathering powder.
That completed the model.
Final step was payment and delivery.
No comments:
Post a Comment