

Hey Mates!
It has been much to long, since the last update on our projects. Has been a insanely busy season with both me and Fayte picking up several new commissions.
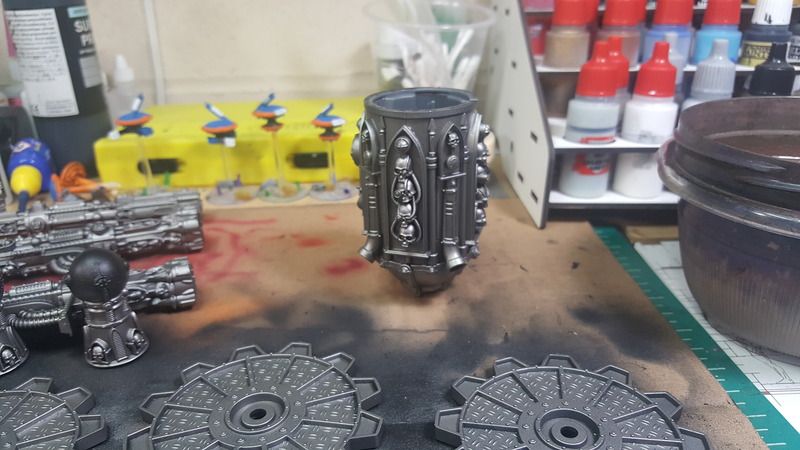
Speaking of commissions I have one of my latest ones am working on right now.

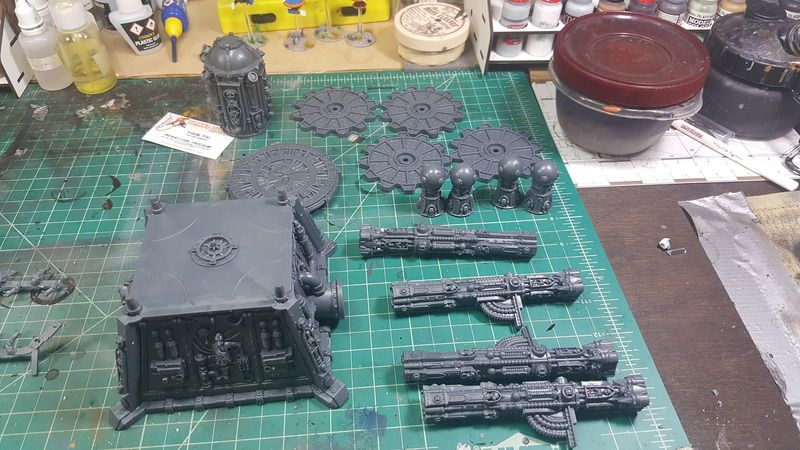
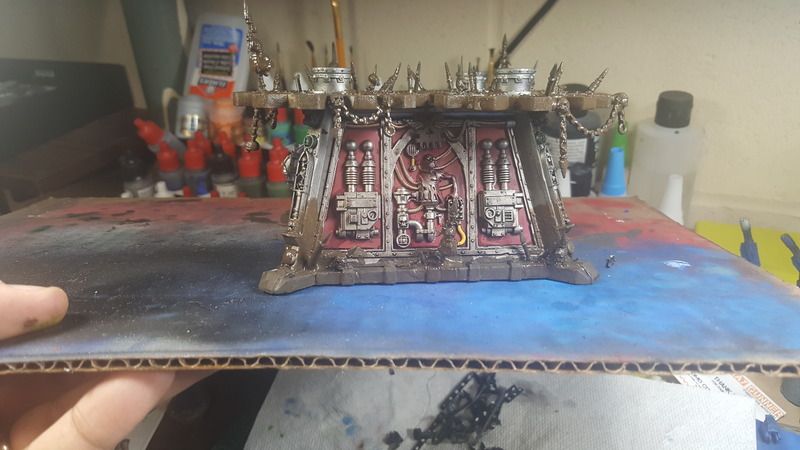
This void shield is actually one of three that people are wanting me to paint. The local store gave me one to paint, which I plan to do later in a basic scheme so it will fit into any army the uses it.
This is a custom order, the client asked me to take this fortification of the Imperium and make it chaos, very chaos.
To achieve this I picked up a bunch of spike bits from chaos players. Clients only color requirements where red and metal that gave me a lot of options on how to put this together.
I decided to go with a miss treatment look. The Imperium has alot of tool that keep there equipment in great condition. This is how they last thousands of years, constant maintenance work. I figured that chaos would be much more rough, and not as respectful of the fortification. The allows me to do some heavy weathering work later in the project.
Games workshop paints:
Fless grit yellow
Avelon Sunset
Leadberchel
Korne Red
Mephiston Red
Mephiston Red
Rhinox Hide
Agras earthshade
Nulin Oil
Nulin Oil Gloss
Balthasar Gold
Eshin Grey
Abbadon Black
Balor Brown
Ushabiti Bone
Screaming skull
Typhus Corrission
moot green
Calagon Green
Blood for blood god
Abbadon Black
Balor Brown
Ushabiti Bone
Screaming skull
Typhus Corrission
moot green
Calagon Green
Blood for blood god
Army painter paints:
Matt Black
Plate Metal
Vallejo Paints:
White Primer
German Grey
Satin Varnish
Gloss Varnish
Secret Weapon miniatures
weathering powders:
Rust orange
Rust Red
Brick Red
Rust Red
Brick Red
Clay Brown
Exhaust Black
Dark Earth
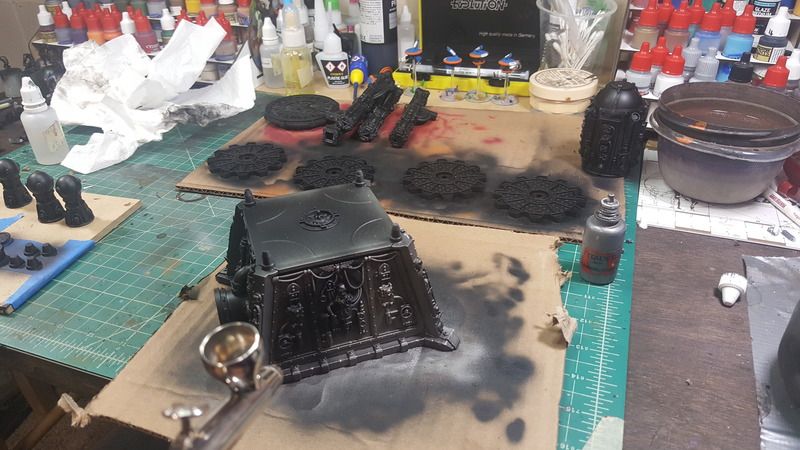
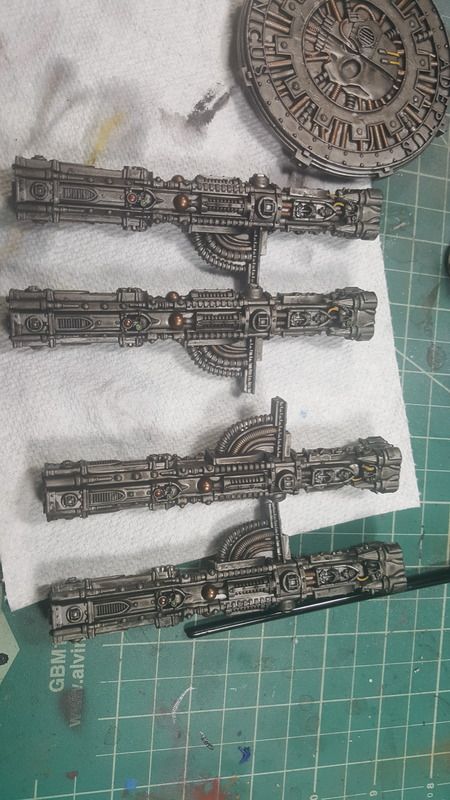
I started with doing the metallic work using a blend from a light metal to a darker. A simple 3 metal tones AP - Plate metal, AP - Gun metal and GW Leadberchel
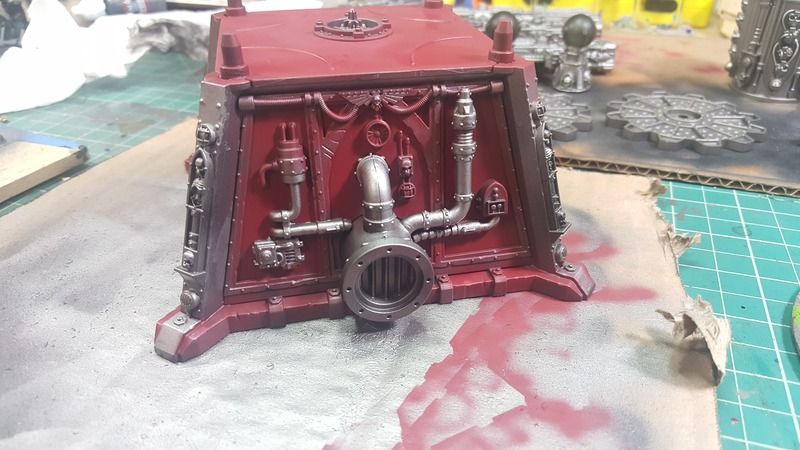
I ended up having the clean up the over spray work when adding the red, If I did this step again I would of done red first and added abit of bronze color on the pipes, for further debth. Ultimately its a very minor detail, once we get to the end of the project.
Once completed I did a blend of reds using Korne red as the main base color. This matches other projects I have done/will do for the client.
I accidentally forgot to do this part while I was doing the main base blends. Thankfully this gave me a chance to try a different approach.
This part I made red as well, I handed painted the red rather then airbrushed. I found that worked alot better. Gave a more neat feel and then I used a very small brush flow to highlight.
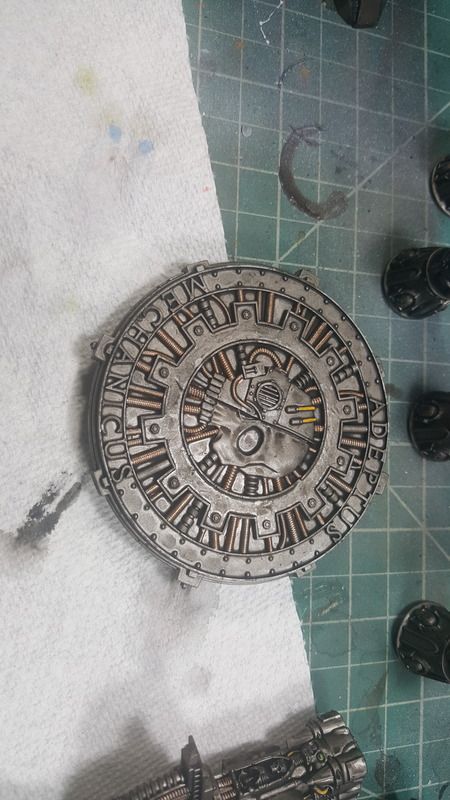
I then applied washes once blending was done, I began raising the colors again on the metals, being careful to not lose the added debth from the shade. In the passed I would of just dumped shade on it and called it perfect. That is okay for tabletop quality but this piece has so much going on that I wanted to do justice to the model. Also client is paying me a generous amount to do a good job.
The wires I noticed most people ignore them or paint some black. I did most of them in a dark gold color and some in black on the model. Other wires normal done in red I used yellow to add contrast to the model.
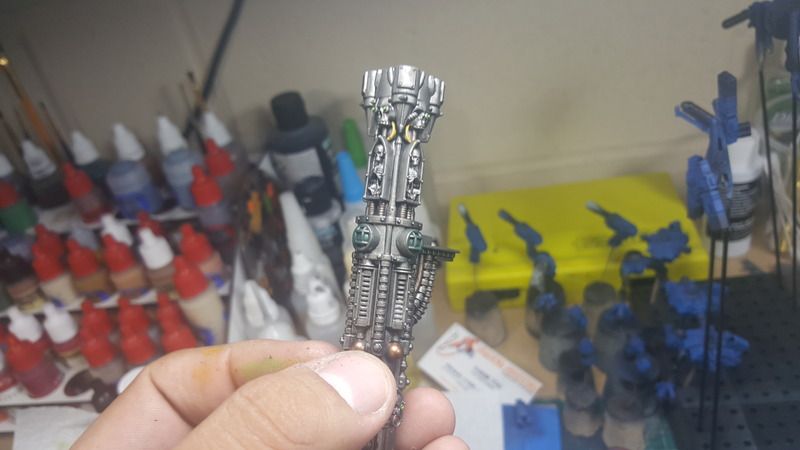
Green is a common color on the lens.
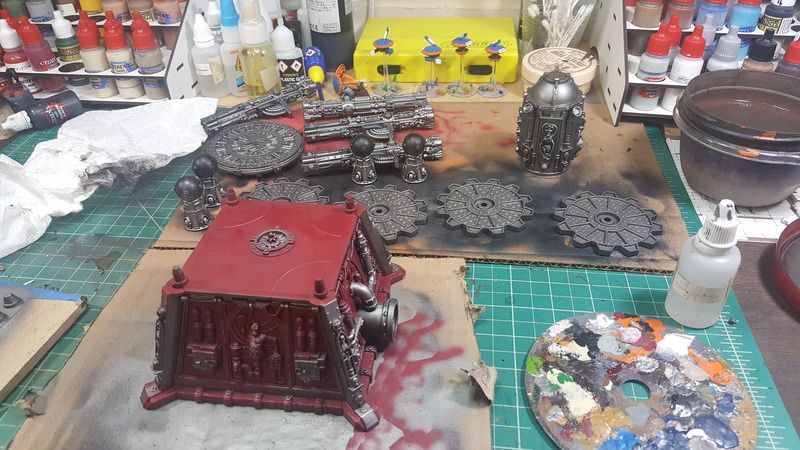
I began to add some chaos markings over any imperial seals. I painted them a dark brown, applied a shade and did some highlights. There parts are not gonna be very prominent do to the model's height and they are not the main focal point.

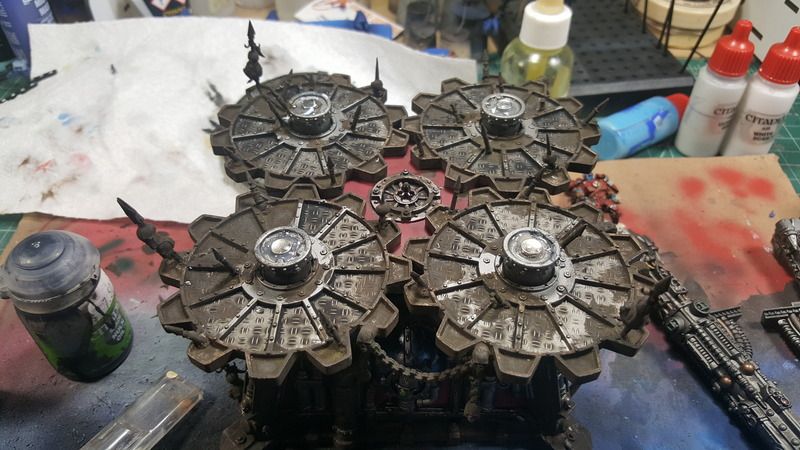
Once the model was in an acceptable stage. I started to add some texture paint to the model to begin adding the aged, rusted, in the elements feel. In my head I see this as a fortification captured by Chaos long ago, that they keep running with backwoods repair jobs and are not as interested in it looking great. Since its a holy relic of the Imperium, they wouldn't be as likely to treat it with respect.
Spikes! Spikes! Spikes!!!
I was more generous with glue along the base, to make sure the spikes stayed planted. This is not a show piece its a tabletop piece and will be moved around. I applied more texture paint to the edges, the heavy glue under give a built up grunge affect.
Another way I do this is to use clay, puddy, sand etc.. pretty much anything that is gonna create some curves. The glue just happened to do the trick saving me a step and ensure extra strength on the spikes.
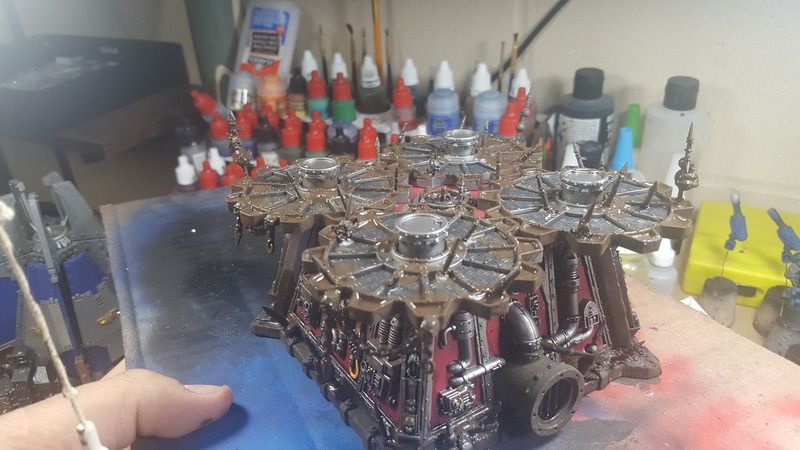
The next stages will be to finish any details I can't reach when assembled and covered in spikes.
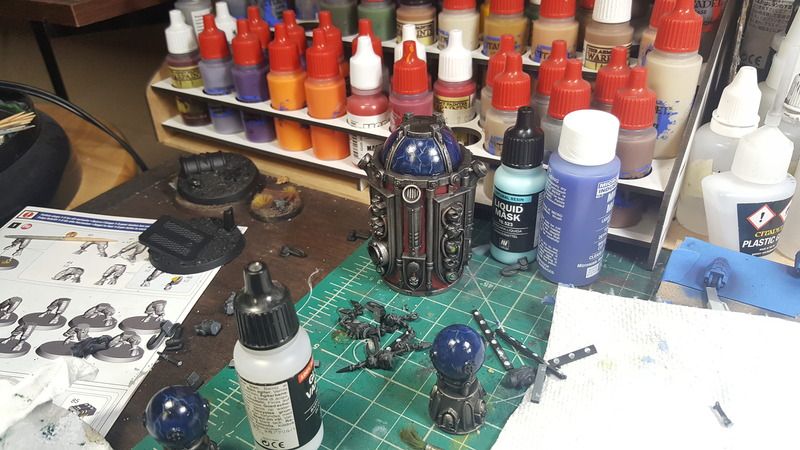
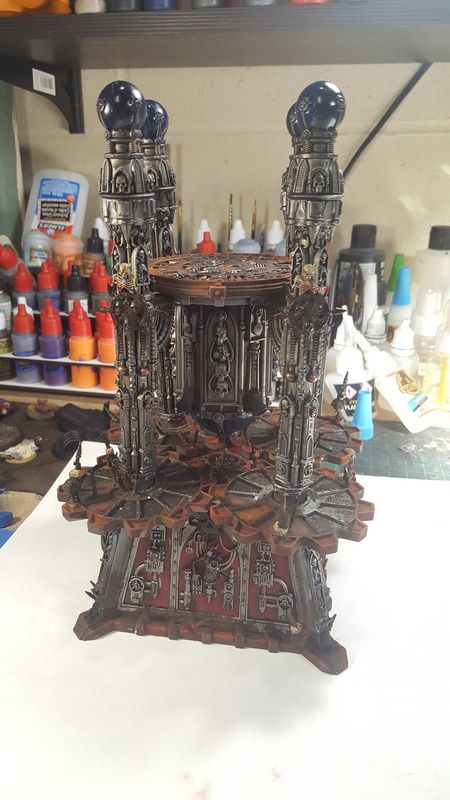
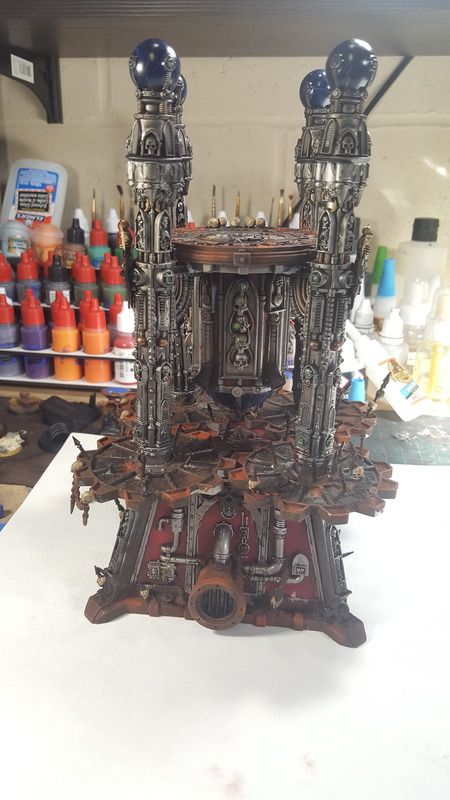
Lightening theme was applied to the orbs, I used a series of glazes and finishes to give a blue hoe to the white lightening bolts. Gloss finished was applied over the orbs to give them a nice shine.
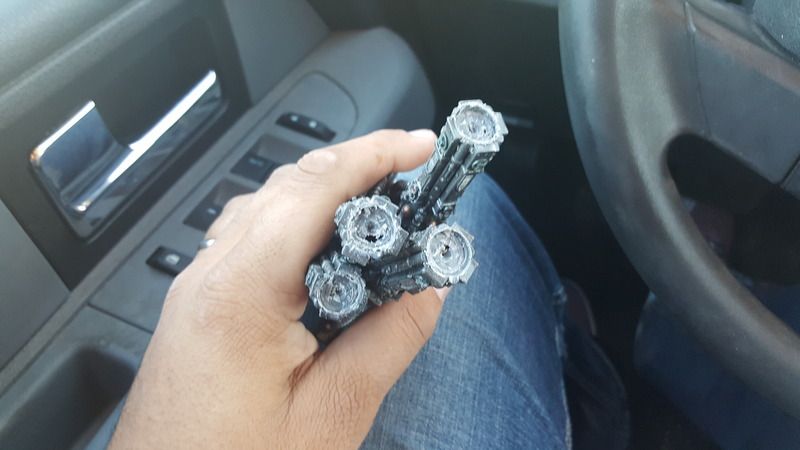
I then got a updated on the order to, magnetize the model. I would normally do this step during the assembly phase to not damage the paint job. My suggestion is that magnetizing this model is must! Turned out really great, but I strongly recommend doing it before you put primer on the model.
I used a drill press on a low speed to make the holes. This was very difficult due to not being able to mount the supports. Using any clamps would ruin the paint, so I ran the drill press and used my hands as the clamp. Essentially i let the drill bit spin and I guided to supports upward to the drill rather then the drill coming downward.
Is no room for error on this part guys, you mess this up and get to close to the walls you will destroy the support.
My client provided me with funds to get magnets due, the ones I got where too big and didn't contain enough to make the model solid. I opened a pack I had at home with a slightly smaller size and that worked fine. You need to have all four supports magnetized or it gets wobbly.
I ended up going into auto pilot a bit, and next thing I knew the model was done!
Hope you enjoy this post, on the void shield...
No comments:
Post a Comment